Friday, November 30, 2012

Roasted Brussels Sprouts

Yesterday I walked into Trader Joe's and there was a big display full of brussels sprouts on the stalks. I'm not sure what it was about them but they looked wonderful. As I stood there staring at these marvelous brussels sprouts I thought to myself "I wish I liked brussels sprouts because they look so tasty" as I continued to browse through them I realized I actually had no idea what they even tasted like; I actually couldn't remember ever eating them. I then realized I always just assumed I didn't like them but really I had no idea if I liked them. I figured what the heck, let's give them a try!  I am so glad I did because I discovered I love brussels sprouts - They are super yummy!! After realizing how much I enjoyed them I figured I'd investigate some of their health benefits too because to me that's always an added bonus to tasty food. 

Brussels sprouts contain high amounts of fiber which can help lower cholesterol. They can reduce inflammation, help support cardiovascular health, lower the risk for cancer, help keep our bones strong, and improve our immune system. If you want to check out even more that brussels sprouts can do for you check out 11 Health Benefits of Brussels Sprouts otherwise let's continue :)

The brussels sprouts I bought were still on the stalk so I started by cutting them off and washing them.

Once they are washed peel off any leaves that are yellow or have spots. I then cut them in half and put them in a mixing bowl.


In a small bowl I combined 1 1/2 Tablespoons Olive Oil, 1 1/2 Tablespoons Lemon juice, 1 clove of garlic minced, salt and pepper. Then I poured this mixture over the brussels sprouts and stirred them until they were evenly coated.

I put them on a baking sheet and cooked them at 425 degrees for 15 minutes; half way through cooking I tossed them to make sure they were cooking evenly. Then I sprinkled them with parmesan cheese and baked them for another 5 minutes.

They came out perfectly roasted - crisp on the outside and soft on the inside. Enjoy! 


Whole Wheat Honey Dinner Rolls

The first Thanksgiving I spent with my husband's family everyone talked about his aunt's homemade rolls; they were a staple at holiday meals. It was the first time I had ever had pull apart rolls and they were amazing! I remember the first holiday where she did not have time to make them and store bought rolls were served - it did not go over well. At my bridal shower I was given the recipe, a giant mixing bowl, and kitchen towels to learn how to make them myself. The family tradition had been passed on to me... no pressure or anything. My husband however joined the Marine Corps and we no longer live near his family so I have not had to bring them to a holiday dinner yet but that doesn't mean we can't still enjoy them. I have changed the recipe a bit and made them into whole wheat honey rolls and they are delicious. 

These rolls are a little time consuming; although most of the time they are just sitting and rising. They also make quite a large batch, typically about 32 rolls so it's something you could do on a Sunday afternoon and then have yummy homemade rolls to go with dinner all week long. There is something truly magically about homemade rolls - they pretty much go with everything and they make any meal tastier. 

One trick in baking bread that will make it turn out better is to have all ingredients at room temperature. This is true when making cookies and cakes as well. There is a whole scientific explanation behind it involving fats and air bubbles which you can research if you are truly fascinated by the whole thing - or you can take my word for it that using room temperature ingredients will result in lighter, better tasting bread. If you have planned your baking ahead of time you can let the egg sit on the counter for 30 minutes to an hour or if you are a spur of the moment baker just let the eggs sit in a bowl of warm water (not hot!) for about 5 minutes. 

I made these rolls using my stand mixer which has a metal bowl, so to help keep the ingredients all at room temperature I rinsed the metal bowl out with hot water to warm the bowl up. 

The first thing to do is dissolve 1 packet of dry active yeast in 1 cup of warm water. If you only have a jar of dry active yeast 1 packet is equal to 2 1/2 teaspoons. You'll know it's done when it starts to foam up, this takes about 5 minutes or so. 
 Add in 1/2 cup of honey, 1 egg (beaten and at room temperature), 2 teaspoons salt, 1 cup warm milk (I microwaved it for about a minute then let it cool a little), and 1 stick of butter that is melted and mix slowly with the dough hook or by hand if you don't have a mixer. 

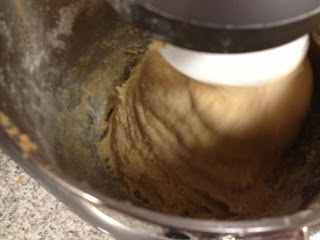
  Slowly add in 5 - 5 1/2 cups of whole wheat flour, 1 cup at a time. You may need to scrape the sides of the bowl with a spatula as it mixes. The dough will end up coming together in a ball. It should be soft and pliable but not too sticky. Take the ball out and knead it for about 5 minutes on a floured surface. If the dough is really sticking to your hands add in a little more flour and knead it in. You want the dough to not stick to you as you knead it but you don't want to add too much flour and dry it out. 

 Form the dough into a ball and place in a buttered bowl. Cover the bowl and let it rise for about an hour. Now you can wash the dishes, do some laundry, or take a nap :) 
 Once the dough has doubled in size, punch it down and fold it into itself a few times. 

 Spray a muffin pan with non-stick cooking spray. Pinch off a 1 inch piece and roll it into a ball. Place 3 balls in 1 cup of the muffin tin. This can be a little tedious and time consuming. If you have children totally get them involved and have them help you do this. Kids love helping out in the kitchen and it makes this go by faster. However, try and get them to make the balls roughly the same size so they cook evenly. Once the muffin tins have been filled and there is no more dough cover them again and let them rise for another 30 minutes. When they are done rising you can brush them will melted butter and sprinkle with a little salt if you like, or you can skip this step. 

Preheat the oven to 425 degrees and bake them for 8-10 minutes.

Once they are done you should have beautiful golden brown homemade rolls. You can enjoy them immediately (who doesn't love fresh warm rolls right out of the over) or they can be kept in an airtight container for about 5 days. 

Cost Break Down!!

A 5 lb. of flour cost me $2.99, which is $0.56 a cup, considering the flour I used for dusting and the rolls it was probably close to 6 cups of flour which would be $3.36. 5 lb. of honey cost me $12.96 so 1/2 cup cost about $0.95. A 4 oz jar of yeast costs $3.49, so 2 1/4 teaspoon would cost about $0.35. A dozen eggs costs me $1.50 so 1 egg cost $0.13. I believe a package of butter cost about $2.00 so 1 stick would be $0.50. A gallon of milk cost me $3.30 so 1 cup would be $0.20. 2 teaspoons of salt is actually less than a penny so I don't usually add it in. 

All of these ingredients together cost me $5.49 and it made 32 rolls which is equal to $0.17 a roll.

A roll of 10 Pillsbury biscuits costs about $1.50-$2.00 which equals to about $0.15-$0.20 a roll. 

Price wise they are pretty comparable so it won't cost you more to make them from scratch but they will be whole wheat with no refined sugars, preservatives, or additives and that, to me, is delicious :)

Fried Rice

I never liked Chinese take out food growing up; truthfully I don't like it much now. However, a few years ago I was taken to a hibachi restaurant and discovered the deliciousness that is fried rice so I decided to try and make it at home. Homemade fried rice is healthier and cheaper than restaurant fried rice (and I think it's super tasty as well!) 

Let's talk rice - there are a lot of different options here. We've got white rice, brown rice, red rice, black rice, short grain, long grain, basmati, jasmine, wild... the list goes on! What does all of this mean? 

Brown rice vs. white rice 
Brown rice is more intact; it still has the bran which gives you a lot more fiber. White rice is more processed; the bran has been removed and there is not a lot of nutrients in it. It's very similar to the difference between white bread and wheat bread. The texture is different so it may take a little getting use to if you've only ever had white rice. My husband is still not a fan of brown rice so I've been slowly incorporating it into our diet. If you are not use to brown rice you can go all in with it or make it half white and half brown to slowly acclimate yourself to the new texture. I, personally, enjoy brown rice more than white rice and I like knowing that I'm getting more nutrients in it but again it's all personal preference.

Short grain vs long grain 
Short grain rice absorbs water quicker and it ends up being (obviously) shorter and plumper. It also ends up being a little more sticky. It is used more in sushi or risotto. Long grain rice (like Jasmine or Basmati) is firmer. It is longer and skinny when it cooks. However, Jasmine rice does tend to be a sticker long grain rice when compared to basmati. 

When making fried rice you don't really want sticky rice so I would go with a long grain variety. If you are using white rice I would choose Basmati, if you are using brown rice just look for a long-grain variety. 

Another trick when making fried rice is you want the rice cool when you add it to the pan to fry it. How I typically do this is I make the rice (I have a rice cooker which makes cooking rice super easy!) and when it's done I transfer to a bowl and then start the fried rice. By the time I need to add the rice it's had a chance to cool off. If you are looking for a quick lunch you could even buy a bag of rice you pop in the microwave to cook. Don't be intimidated by cooking because there are always little short cuts you can use if you need to while you are still learning. 

I also think one of my favorite things about rice is that it's easy to change the quantity depending on how many people you are cooking for. I made this for my family (4 of us were eating) and I used 2 cups uncooked rice. If you are making it for 2 people use 1 cup of rice, if you're making it for yourself 1/2 cup of rice, not very hungry 1/4 cup of rice... see it's super easy :) Now that we've got our rice cooked let's get frying! 

Start by heating 1 Tablespoon of olive oil over medium heat in a large skillet. Add diced onions and cook for about 2-3 minutes. If don't really like onions, just use a small amount. However, I think the onions give fried rice it's really good flavor so don't be afraid to try a little extra in it. Also, if you dice the onion really small, almost to the point of mincing it, you will get the flavor without having the pieces of onion in the rice when you eat it. For 2 cups of uncooked rice I used half an onion. 


Once the onion has cooked add in frozen peas and carrots. I typically do 1/3 - 1/2 a bag; my kids LOVE fried rice so I like to have a good rice to veggie ratio for them. This is another part that you can customize as you please - you could add green onions, bell peppers, mushrooms, broccoli, water chestnuts, etc. I like to keep it simple.


Once the peas and carrots have cooked for about 5 minutes move them to the edges of the pan and crack an egg in the center. Typically if I'm making a big batch for my whole family I'll use 2 eggs but today I just did 1.


 Scramble the egg, cook it until it is no longer runny, and then stir to incorporate it into the veggies. If a couple of the veggies get into the egg while you are cooking it that's not a big deal; don't stress out trying to keep the egg in the center and everything else on the sides because it's all getting mixed together anyways.


Once the egg is cooked add in the rice and soy sauce. There isn't a exact measure for adding the soy sauce either. I typically start with 2-3 Tablespoons, taste the rice, and add a little bit more if I think I needs it. Again, this is all personal taste and flavor so adjust it until you like it. Cook for about another 5 minutes or until the rice is heated through. And there you have it, delicious homemade fried rice! You could even add chicken, shrimp, or beef to it and make it an entire meal.

Cost Break Down!!

Now, I actually don't know how much all of the ingredients cost me because most of this stuff I already had around the house so this cost break down is more of an estimate (although I typically try to overestimate costs when I'm not certain on the price). I know my olive oil costs me $0.08 for a Tablespoon. I'm pretty sure my 5 lb bag of rice cost about $15 so 2 cups would be about $2.50. An onion costs me $0.25, so half an onion would be $0.13. A bag of frozen peas and carrots is $1, so half of it is $0.50. 1 dozen eggs is about $1.50 so 1 egg would be $0.13. My 15 oz. bottle of soy sauce was about $2.75 and 3 Tablespoons is 1.5 ounces so the soy sauce costs $0.28. 

All together I made a large bowl of fried rice for my family of 4 for less than $3.75      


Tuesday, November 20, 2012

Cucumber Sandwiches

This is a quick snack I whipped up for my 18 month old today so I thought I would share it. Earlier today I made hummus and my daughter loves this so much she will eat it plain with a spoon but I decided to add some veggies to the snack to make it even healthier for her. 

All you need is a cucumber, a small cookie cutter, and some hummus.

 Thoroughly wash the cucumber and cut it into slices. Instead of pealing the skin off of it, just use a small cookie cutter and cut out the inside. Today I chose a star. 


 Once the shapes have been cut out just spread some hummus on them and make little sandwiches. As simple as that you're done! Yummy :)

Homemade Hummus

With the holidays comes parties and get togethers and what better way to celebrate than wow-ing everyone with a homemade dish! I'm guessing most people know what hummus is since it has gained a lot of popularity and is now commonly found in restaurants as an appetizer or on wrap sandwiches. However, if you do not know what it is, it's a Middle Eastern dip or spread made from chickpeas (also known as garbanzo beans). 

If you have never had hummus before you should absolutely try it! Partly because it's completely delicious and partly because it's actually really good for you. Chickpeas have very high amounts of insoluble fiber; this type of fiber is great for colon health. I know, the colon  is not something people want to talk about when thinking of food but if eating something as yummy as hummus could possibly help prevent colon cancer I'm on board with that! Plus, isn't that the point of eating real food - to get healthier! And it tastes good.

Hummus is so simple to make at home. It took me a total of about 10 minutes to get all the ingredients out, make the hummus, and put everything back. So let's get started.

You will need 1 can of chickpeas (15 oz.) - this can also be done with dry chickpeas if you want to soak them overnight. Dry chickpeas are definitely cheaper but I prefer canned ones since I can whip this up whenever I have a minute and it doesn't have to be planned out. This is totally a personal preference. 

You will also need Tahini. Before I made hummus for the first time I had never even heard of Tahini. It actually took me awhile to find it in the grocery store. Tahini is just ground sesame seeds. I found it in the speciality food section of our store. Other stores have it in the ethnic food aisle and others have it by the peanut butter. My motto is: when in doubt just ask someone.

 If you are using canned chickpeas make sure you drain and rinse them first. Then pour the can of chickpeas, 1/3 cup of water, 3 Tablespoons Tahini, 2-3 Tablespoons lemon juice, 1 tablespoon olive oil, 2 cloves of garlic, 1 teaspoon cumin, and 1/8 teaspoon salt into a food processor.

You can leave the hummus as is and it will be great or you can individualize your hummus. If you like it a little bit spicy you can add another clove of garlic, some people enjoy pine nuts, olives, or pesto, the list goes on. I chose to add sun dried tomatoes to mine

Now just turn the food processor on until the hummus is a nice creamy consistency. And viola! You just made homemade hummus Yay! Now you can use it as a dip for crackers or veggies, or spread it on a whole wheat tortilla to make a delicious wrap.

Cost Break Down!!
I found a can of organic chickpeas for $0.95. The 16 oz jar of Tahini cost me $3.50 which is $0.22 an ounce. 3 Tablespoons is 1.5 ounces so the Tahini for the hummus cost $0.33. A head of garlic cost me $0.25 so I'm guessing 2 cloves would cost maybe $0.05. A fresh lemon cost me $0.15 but you could also use just a bottle of lemon juice. My 32 ounce bottle of olive oil was $4.99, so this is $0.16 an ounce; 1 Tablespoon costs $0.08. I honestly don't know how much my salt or cumin cost me but I'm going to guess the small amounts I used cost about $0.10 (and I'm overestimating) 

All together I made 16 ounces of homemade hummus for $1.66 That is just $0.10 an ounce!! 
A 10 oz container of hummus at the grocery store costs $3.99. That is $0.39 an ounce.
  

Sunday, November 18, 2012

Whole Wheat Pizza

I love pizza, my husband loves pizza, and my kids love pizza.... in fact I don't think I've ever met anyone who doesn't love pizza. It can be simple or complex and it's one food you are able to completely personalize. However, one thing pizza does not have a reputation of being is healthy. But it doesn't need to be that way. This variation of pizza has a whole wheat crust and homemade sauce with no sugar!  Not to mention it's completely amazing :)

First we will start with the crust

Dissolve 2 1/2 teaspoons of active dry yeast in 1 cup of warm water. If the water is too cold it won't activate the yeast, but if it's too hot it will kill the yeast. 110 degrees typically recommended. After the yeast has dissolved stir in 1 teaspoon honey and let it sit for about 5 minutes. It will begin to foam; that is how you will know the yeast is working.


While the yeast is sitting, mix 2 cups of whole wheat flour and 1 teaspoon of salt in a bowl. Then form a well (a hole) in the middle of the flour. Add in 1 tablespoon of olive oil, 1 tablespoon of honey, and then the yeast water mixture. Stir together in a food processor or stand mixer with the dough hook for about 5 minutes. You may have to scrape the sides of the bowl as it mixes. If you do not have either, it can be mixed and kneaded by hand (this will take a little bit more work but trust me it's totally worth it!) The dough will end up being a ball running around the bowl. If it is too sticky add flour; 1 tablespoon at at time until it is a good consistency. 
 Now, to be perfectly honest the crust on a pizza is pretty much just like an edible plate that holds all the good stuff (like cheese) but it doesn't have to be! I like to add a little flavor to my crust. This time I added in 1 teaspoon oregano, 1 teaspoon garlic powder, and 1 teaspoon basil. But really it's your crust get creative as you like. If this was my husband's personal pizza I'm sure crushed red pepper flakes would have been added in as well.

Form the dough into a ball and place in a lightly oiled bowl and cover. Let it sit for about 45 min. to an hour or until it has doubled in size.

While the dough is sitting it's a perfect time to make some pizza sauce! Combine 1 1/2 cups of crushed tomatoes with 1 can of tomato paste (6 oz.) Again, this part you can customize as much as you want and add in the flavors you like. I went with 1 teaspoon oregano, 1 teaspoon basil, 1 teaspoon garlic powder, 1 teaspoon onion powder, 1/4 teaspoon salt and 1/4 teaspoon pepper. Stir it all together.


 I also stir in 1/4 cup of red wine. This is completely optional but I think it gives it nice flavor. Again, make this your sauce with flavors you enjoy (my husband would be adding crushed red pepper flakes again) Let the sauce simmer for about 15-20 minutes, stirring occasionally. This helps bring out all the flavor and cooks off the alcohol if you did add wine to it.

This also gives you time to prepare any toppings you may want on your pizza; such as chop up veggies or grate cheese.


When the dough is ready punch it down, shape back into a ball and then roll out on a greased pizza pan. It can also be rolled out on a baking sheet if a pizza pan is not available. Top with sauce, cheese, and anything else your heart may desire. Tonight was just a plain old pepperoni night at our house (except for my daughters just cheese section) Bake at 500 degrees for 10-15 minutes.
Enjoy!! 


Saturday, November 17, 2012

Roasted Sweet Potatoes

With Thanksgiving less than a week away I've got holiday food on my mind. When most people hear "sweet potatoes" I'm sure the image of a casserole with little marshmallows on top pops into their head.... marshmallows are basically candy and my kids don't need candy for dinner. Especially when there are so many other ways to prepare them that are healthier, easier and cheaper! No pecans, no brown sugar, and no marshmallows necessary.

Before we get started, let's discuss the difference between yams and sweet potatoes. If you are shopping in a typical grocery store chances are they are both sweet potatoes! They are just different varieties of sweet potatoes so they have been distinguished by calling one a sweet potato and the other a yam. 
Fun Fact!! 
The one on the left is considered a sweet potato; the one on the right is considered a yam. So what's the difference? The variety called a sweet potato is light colored and tends to be drier, crumbly and not quite as sweet. The variety called a yam has reddish skin with bright orange inside; it tends to be softer and sweeter when cooked. 

True yams are actually not even related to sweet potatoes. They have more of a brownish skin with purple or red insides and are more common in hotter climates such as South America and Africa. 


While we're having a fun fact moment lets compare sweet potatoes with regular potatoes. Regular potatoes have been given a very bad reputation (poor potatoes). They do have a few more calories (110 for a medium potato compared to 100 for a medium sweet potato) and contain slightly fewer vitamins and fiber than sweet potatoes. Regular potatoes raise your blood sugar levels higher than sweet potatoes do. Sweet potatoes have significantly more beta carotene in them (which is what makes them orange) and that special vitamin A helps protect our vision and can boost our immune system. However, regular potatoes contain more potassium than sweet potatoes. 

With that being said, my husband is not a fan of sweet potatoes,  I totally love them, and my kids go back and forth. If you are making sweet potatoes for the first time or are trying to get your family on board with eating them (or heck just trying them!) I suggest making regular potatoes and sweet potatoes together in one big happy potato party. 

The best way to get your family to try new foods is exposure, exposure, exposure!!! The more they see a new food and the more they taste a new food, the less it will be  thought of as something "new" or "weird"; it will just be another food that appears on the dinner table. Think of a baby trying food for the very first time; the first several times they try something they make a strange face and spit it out. But, if you keep offering it to them and having them try it they eventually stop spitting it out and making funny faces and sometimes end up completely loving it! So don't give up hope after 1 attempt, or 2 or 3... :)


Whew! Ok, now that we got all of that out of the way, let's cook! I started with 3 medium regular potatoes and 1 large yam. Wash and scrub them thoroughly and preheat your oven to 375 degrees.


As with any cooking, equal size pieces are very important to ensure even cooking. I start by cutting the potato in half, then in quarters, then dicing. 

 I then repeat the same process with the yam. Yams tend to be harder than regular potatoes so make sure you are using a sharp knife to cut them. 
 Once I have them all diced I toss them in a 9x13 pan and add 2 Tablespoons Olive Oil, 1 teaspoon salt, 1 teaspoon pepper, and 1 teaspoon Italian seasonings (basil, oregano, thyme, garlic, sage, and rosemary). Stir the potatoes to evenly coat them in the oil and spices.

 Bake at 375 degrees for about 45 minutes. You will have a sweet and savory potato mix with no added sugar needed :) Enjoy!! 

Cost Break Down!
I purchased a 5 lb. bag of potatoes for $1.50 and it had about 12 potatoes in it which equals out to about $0.12 a potato; so the 3 potatoes I used cost $0.36. The one yam I bought cost $0.60. My olive oil averages out to about $.20 a Tablespoon so 2 tablespoons is $0.40. I have McCormick's Italian Seasoning which costs $0.32 a teaspoon. So the entire dish cost me $1.68 and it fed myself, my husband, and our 2 older daughters. Not too shabby when compared to a medium french fry at McDonald's that costs $1.79 (and we're not even getting into the health comparison of those!)

Thursday, November 15, 2012

Pumpkin Spice Coffee

I understand this post is not a food for kids post. However, I totally have a love relationship with coffee and pretty much every mom I've ever met loves coffee. So my train of thought is - coffee makes moms happy, happy moms means happy kids, therefore; coffee makes kids happy. So in a very round about way this is still a post for kids. :) 

As soon as October hits EVERYTHING becomes pumpkin spice flavored and then it's gone! Trader Joe's was out of their pumpkin spice coffee before Halloween. I don't know about all of you but November and Thanksgiving is still fall to me and I'm not quite ready to give up on all the pumpkin spice goodness quite yet. Luckily we don't have to! 

You can make your own pumpkin spice at home

Pumpkin Spice Recipe
Adapted from Deliciously Organic 

1 Tablespoon ground cinnamon
2 teaspoons ground ginger
1/2 teaspoon ground nutmeg 


To make pumpkin spice coffee mix 1/2 teaspoon of pumpkin spice for every 2 tablespoons of ground coffee you use and brew. 

I serve mine with 1/2 tablespoon of honey and 3 Tablespoons of milk. Not only is this delicious but it has no artificial flavors, no refined sugars and no preservative.


Cost Break Down!!
Now since this post is for moms I've decided to do a calorie comparison instead of a dollar comparison because if you are spending $4.50 for a Starbucks latte this is clearly much cheaper! A 16 ounce Starbucks Pumpkin Spice latte has 380 calories. A 16 ounce cup of brewed coffee with milk has 30 calories and 1/2 Tablespoon of honey has 30 calories. So, a cup of homemade pumpkin spice coffee has 60 calories compared to a Starbucks latte of 380. That makes me happy and so does this happy afternoon treat.  

Veggie Quesadilla

Here is another recipe for some ideas as to what to do with all those yummy tortillas you may have. A veggie quesadilla!

This first thing to do is to sprinkle shredded cheddar cheese on half of the quesadilla. I buy the block of cheese and shred it myself but already shredded cheese works too.

Then fill it with whatever you may have on hand. Today we had tomatoes, avocados, and black beans. I like having cherry tomatoes around because it is easy to grab as many or as few as you need without having to cut up a whole tomato; plus I think they taste sweeter than regular tomatoes. If your kids are not veggies eaters or typically only eat plain cheese quesadillas try to slowly incorporate veggies. Starting with one new thing at a time in a food they already love is a good way to introduce kids to new foods without overwhelming them. I would try avocados first because they have a very mild flavor and creamy texture so they don't stand out as much as tomatoes would. I would also start by adding just a few or even just putting them on half. You may be surprised at what your kids will eat when covered in delicious, warm, melty cheese. 

 Next, sprinkle a little more cheese on top of the veggies. Cheese is like the glue that holds the tortilla shut so if there isn't any cheese it won't hold the tortilla closed.

Fold the quesadilla in half, place in a preheated skillet over medium heat. You want the skillet to be warm enough to melt the cheese and cook the quesadilla without burning it. Cook it on the first side for about 2-3 minutes and then flip it over. Cook it on the other side for another 2-3 minutes.

Cut the tortilla into triangles. The quesadilla will be hot so make sure to check it before serving. Enjoy!